

U16: Italy 1-2 England (2nd Game)
Updated: Oct 13
Italy and England’s men’s under-16s played a double-header at the end of August.
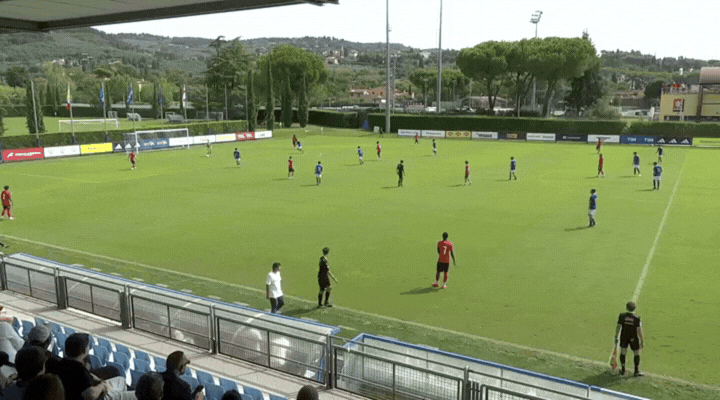
Here is a collection of my notes and observations from the second fixture, which took place on Thursday 27 August at the FIGC Coverciano Technical Centre.
The notes are structured as follows. Click to jump straight to that section:
For reference, much more focus was placed on the England team and players, and therefore the volume of notes for each side will reflect this. If not previously read, here are my notes and observations from the first game which Italy won 3-2 →
Starting Line-Ups

# | Italy | # | England |
|---|---|---|---|
12 | Samuele Spanò | 1 | Charlie Mountain |
13 | Saverio Mesecorto | 2 | Iago Silva |
15 | Fabrizio Pasotti | 5 | Francis Boggan |
16 | Giulio Cacucciolo | 4 | Concilio Tonebi |
17 | Alessandro Gennaro Esposito | 3 | Travis Chilard-Martin |
14 | Mattia Mirabella | 8 | Charlie Robinson (C) |
18 | Davide Tilli | 6 | Jaylen Bolton |
20 | Mattia Pica | 7 | Eliah Semakula |
19 | Francesco Buondonno | 11 | Shakeel Charles |
23 | Mark Chidozie Cordopatri | 10 | Rico Sealey |
21 | Enzo Diofebo | 9 | Ashiah Haughton-Sinclair |
Substitutions | |||
HT | 62" | ||
57" | |||
64" | 71" | ||
84" | |||
Scroll right for England team if viewing on mobile
Goal Summary
0-1 (43rd min): #9 Haughton-Sinclair scored with a powerful shot from inside the box after quickly controlling and shifting the ball following impressive work from #6 Bolton, who received under pressure in central midfield before carrying, side-stepping the onrushing Italy CB and sliding a diagonal through ball into #9 Haughton-Sinclair.
1-1 (80th min): Substitute #10 Vitali scored a penalty. This was conceded following an England ball loss in central midfield, leading to a Italy counterattack. A ball in behind the England defensive line resulted in a collision inside the box, with retreating left-back substitute #14 Crofts adjudged to have fouled the Italy attacker.
1-2 (90th min): #21 Maghoma scored the winner following a fast England attack which started with their GK. After progressing into the Italy half against a disorganised opposition, England switched play to #19 Munoz on their left-hand side, who dribbled inside against the momentum and direction of Italy pressure, before playing forward into #18 Eden on the edge of the box. Eden showed close control and ball manipulation to find a pass inside the congested box, which arrived into #21 Maghoma to control and side-foot finish.
England Team Observations
In Possession
Much like in the first game (read more), a key feature of England's possession phase involved wide build-up, using specific patterns to play around Italy's narrow out-of-possession block, either from goal kick restarts or by recycling play to their goalkeeper and centre-backs to reinitiate build-up scenarios.
In a slight switch compared to the previous encounter, England started more of their build-up attempts on their right-hand side with frequent passes wide to RB #2 Silva who then looked to pass inside to RCM #8 Robinson or forward into RW #7 Semakula's feet. Structurally, England used more of a flat double pivot across attacking phases too, with AM #10 Sealey at times operating more as a second striker and strongly orientating himself towards the right-hand side, creating occassional 4v4 opportunities against the Italy backline.
The ultimate intention of England's wide build-up play was to entice Italy's narrow forward and midfield lines into applying pressure, before bypassing opponents through set passing patterns and then attacking an exposed and retreating backline with half a pitch to defend.
When these opportunities presented themselves (to attack an exposed Italy backline), England attacked directly and quickly, looking for passes and runs beyond into wide areas, typically through the space between the Italy LCB and LB. With England frequently, and often easily, accessing RW #7 Semakula to feet, the Italy LB was forced to push wide to engage, creating a potential opening in the left-hand side of the Italy backline that could be, and was, exploited.
Here are two instances of England's wide build-up patterns leading to final third entries and chances being created. The first example is from the 6th minute. After recycling play, the GK passes wide to RB #2 Silva who passes up the line into the feet of RW #7 Semakula. A pass is then slid in behind for AM #10 Sealey's run beyond and between the Italy LCB and LB, before a low cross into the box creates a near-post goalscoring opportunity.

The second example is from the 47th minute in the 1st Half. Again, following the recycling of play to the GK, a pass is played wide to RB #2 Silva, who set the ball back to RCB #5 Boggan. In a demonstration of his line-breaking ability, Boggan found AM #10 Sealey between the lines before he played behind to RW #7 Semakula, who opted to cut inside on his favoured left foot and shoot, as opposed to crossing to the unmarked CF.

As seen in the three sequences above, when there was space ahead to attack, England did. When unable to attack directly, due to no available support runs beyond or Italy having pressure on and cover around the ball, England retained possession to maintain their territorial advantage by resetting attacks with backwards passes or playing inside, at times executing some clean, one- and two-touch combination play, to initiate switches of play towards their left-hand side.
Whether through wide build-ups or possession spells in the opposition half, England ultimately looked to create chances from wide areas using crosses and cutbacks into the box, or diagonal dribbles towards goal to create combination and shooting opportunities. However, and this is likely one beneficial consequence of England's tendency to get the ball wide in the final third, England's two goals, and some of their more inventive and dangerous approach play, came from attacking centrally.
In terms of actual goalscoring attempts, of which there were only 10 overall, England's came in clusters, with a few in the opening ten minutes, a number just before half-time including the goal, and then a few in the 2nd Half. So while England were successful in consistently getting the ball into the final third, they were less effective in generating actual chances whilst there, with a lack of execution quality on passes, crosses and dribbles and Italy's defensive interference being the biggest factors.
Additionally, due to England playing a double pivot and concentrating a number of players in wide areas to create crossing opportunities, England lacked an additional box threat. This is something #18 Luca Eden provided once coming on, creating one chance and a goal from his runs into and receptions inside the opposition penalty area.
Out of Possession
As per the first game (read more), England predominantly formed a 4-4-2 out-of-possession. During high defensive phases, AM #10 Sealey played in the forward line alongside CF #9 Haughton-Sinclair before dropping deeper when the team protected its own defensive third.
England aimed to apply high pressure from Italy goal kicks and deep build-ups but were frequently bypassed, with Italy's midfield diamond and front-two causing issues. With RCM #18 Luca Eden tasked with covering the Italy DM in these scenarios, England themselves formed a situational midfield diamond without the ball.
The general plan is depicted in the image below and described as follows. The forward line #9 and #10 were responsible for the Italy GK and CBs and angled their pressure to force passes wide. Wingers (#7 and #11) were required to initially maintain narrow starting positions to avoid allowing any direct passes into Italy's outside CMs (#18 and #19), who generally positioned themselves inside and blindside of their winger counterpart, and encourage passes wide where they would then apply aggressive pressure to the Italy FB.

As mentioned, RCM #18 jumped to cover the Italy DM, denying any direct passes through, leaving LCM #6 behind to cover central areas and the whereabouts of Italy AM #20. The England fullbacks started in higher starting positions, often on the same horizontal line as England #6, with the ball-side FB jumping onto the outside Italy CM when the ball was passed wide (backing up the ball-side England winger's pressure), as Italy's outside CMs often pulled wide in these scenarios. At the same time, the far-side FB dropped to maintain 3v2 coverage in the backline. Naturally, the CBs marked and tracked the two Italy forwards.
Ultimately, England intended to lock Italy's build-up onto one side of the pitch and apply aggressive pressure to regain possession, force a turnover or, at the very minimum, disrupt their progression attempt.
Challenges England persistently faced in this defensive phase, however, especially in the 1st Half, were as follows:
Italy's Front Two: Italy always had an advanced target for forward passes. Not only did this increase the probability of their GK finding a target when going long, but even when England applied pressure in wide areas, the Italy FBs knew they had an out-ball. Due to the angle of the England winger's pressure (prioritising blocking passes inside), this created a passing angle for a channel ball, and as the England ball-side FB jumped too, it also created space on the wing for the Italy ball-side forward to run into.
While the England wingers appeared willing and capable pressers (perhaps not as aggressive as the wingers in the first game), as they often needed to initially be narrow to block any direct passes on their inside into the Italy outside CMs, their jumps wide were often slightly delayed, allowing the FB time to execute the forward pass.
Then, when forward passes into and towards the forwards were made, due to Italy having a front-two pairing, it enabled them to combine with each other. Chasing each other's flick-ons and arriving onto the other's lay-off. The pair often made opposite movements, one offering short while the other went beyond, destabilising the positioning and distances between the England CBs, creating space to exploit directly or via teammate support.
While the England far-side FB dropped off to provide coverage in the backline, it still often created two 1v1 matchups on the forward line, which suited the physical and technical skillsets of the two Italy forwards. Furthermore, the two forwards were often in close proximity to compete for the other's second balls, increasing the probability of sustaining territory and attacks from even hopeful long balls forward.
This latter point was further exacerbated by England's other main challenge...
Italy's Central Midfield Overload: With Italy operating with a midfield diamond, it often created a numerical overload against England's central midfield pairing. Italy gained advantages through this, including from second-ball scenarios, with Italy having more players in central areas, and goalside, to compete for and land on second balls, following direct passes into the forward line.
Additionally, when Italy attempted to play out using deep ball circulation during their build-up phase, England's midfield duo could get caught between opponents, especially when the far-side England winger had not tucked inside as cover, creating momentarily unmarked Italy players (typically the far-side Italy CM) able to receive and progress attacks.
The majority of Italy's chance creation came from direct play in their build-up, playing over and around England's high pressure. This limited England's necessity to defend in a mid-block for any prolonged period; it was generally a constant back-and-forth between defending high and low, and dealing with the shifts between these two phases.
With Italy, like England, attacking quickly and directly when able to, once entering the opposition half, the majority of England's defensive actions in their own third and box involved getting back in numbers (which England players were prepared to do and did), 1v1 duels (of which their FBs won a good number of, especially out wide) and making blocks and clearances inside and around the box (again, multiple examples of this).
England Player Observations
#1 Charlie Mountain (GK): Minimal opportunities to perform goalkeeper actions; the majority of his involvements were in-possession, operating as a third, central centre-back in deep build-up. Right-footed. Varied distribution, including short ground passes and throws to CBs and FBs (mostly successful, with a few misplaced or underhit, but rarely under any real pressure), clipped passes over Italy's first lines of pressure into channels (mixed success), and longer balls into the forward line (decent accuracy, with balls typically able to be won directly or at least contested by teammates).
#2 Iago Silva (RB): Heavily involved in England's deep build-up, positioning himself low and wide right to offer a passing option around Italy's forward line and entice pressure from their LCM before looking to pass inside to RCM #8 Robinson or play forward into RW #7 Semakula's feet. Invariably successful with these passes, as patterns were clearly prepared for, but also showed ability in the occasional moments when required to play free. Provided attacking support on RW, offering below and beyond (overlaps) options.
Defensively, Silva had multiple successes in winning wide 1v1 defensive duels. Plus, performed his role of applying tight, back pressure to the LCM in high defensive phases, denying and disrupting Italy's wide build-up attempts. As he played camera side in the 1st Half, witnessed the England Head Coach repeatedly instructing him to tuck infield when the ball was on the far-side, presumably to maintain a rest-defence position and offer a connecting switch pass.
#5 Francis Boggan (RCB): Very impressive display, with and without the ball. Made a number of interceptions, tackles and clearances, inside and outside the box. Demonstrated defensive awareness, anticipation, body shape, positioning and composure. Applied back pressure to CF opponent when balls played into his feet or chest but didn't overcommit. Provided channel-depth cover when required, displaying speed and strength to match and better opponent.
Right-footed. Consistently provided nearby teammates with a passing option, dropping off, creating himself space to receive. Showcased passing range (varied distances and angles) and quality (weight, direction and timing) with short, crisp passes out wide and disguised, line-breaking passes into central midfield and forwards, under varying degrees of pressure. In 1st Half, one instance of an overlapping run and measured cross on RW, and a couple of accurate first-time passes.
#4 Concilio Tonebi (LCB): Minimal notes. Left-footed. Mainly circulated possession, passing wide to the LB, across to the RCB, or recycled to the GK. Provided nearby teammates with a passing option, dropping off, creating himself space to receive. Limited defensive observations.
#3 Travis Chilard-Martin (LB): Had a few successes in winning wide 1v1 defensive duels. Lost a couple, but mainly appeared due to physicality mismatch versus opponent (height and strength). Made one last-ditch recovery block inside the box following an England turnover in the defensive third on their right-hand side, showcasing pace to recover from the far-side.
Provided an outlet on the left-hand side, positioning himself low and wide to offer a passing option around Italy's forward line and entice pressure from their RCM before looking to play forward into LW #11 Charles' feet or inside to LCM #6 Bolton. Supported below the ball and made underlapping runs in the final third. One impressive instance of protecting the ball under tight pressure before dribbling to escape.
#8 Charlie Robinson (RCM) (C): Involvements in every attacking and defensive phase. Energetic. Always on the move. Displayed separation movement in central midfield to create space to receive. On the move again after passing. Consistently provided the RB and RW with an inside passing option. Appeared more adept (had more success) playing short as opposed to long, although his pass attempts over appeared to be more part of patterns of play. Couple of instances of effective dribbling under pressure in congested central areas. Mobility helped out of possession, enabling him to apply pressure, win some interceptions and tackles, compete for second and loose balls.
#6 Jaylen Bolton (LCM): Involvements in every attacking and defensive phase. Glided up and down the pitch and demonstrated an ability to accelerate in moments. Left-footed. Impressive assist which showcased ball protection, a body feint, carrying ability, a change of pace and direction, and the vision and technique to play an incisive diagonal through ball into the box.
Regularly played one- and two-touch to retain, maintain and progress possession. Used frame to protect the ball under pressure in congested central areas before retaining possession. Competed for second and loose balls. Lacked aggression and intensity in a couple of contested duels but very small sample, so perhaps overly critical.
#7 Eliah Semakula (RW): Strongly left-footed. Played high and wide on the right wing. High in-possession involvement due to England's RW build-up bias. Generally received to feet, either on the outside of the Italy backline or dropped short on the RW touchline. Occasional runs beyond. Lacked execution quality on shots and crosses. More success performing push-and-run dribbles than using close control, ball manipulation and body feints in small spaces. Was often doubled up on defensively, which was a factor in his dribble success and direct chance-creation volume, alongside his left-footedness which sometimes made his attacking actions predictable and easier to influence.
When space ahead or in 1v1 or 2v1 scenarios, Semakula attacked directly, either through diagonal dribbles towards goal or sliding passes in behind for underlapping runs from teammates, with the latter producing more threatening moments. When unable to attack directly, Semakula retained possession, holding onto the ball to wait for teammate support, or playing inside or backwards to reset attacks or initiate switches. His left-footedness was likely a factor in this, but it also appeared to be a team tactic to maintain their territorial advantage.
#11 Shakeel Charles (LW): Minimal attacking involvements, as much of England's build-up and attacks were on their right-hand side. Played high and wide on the left wing. Played mainly with his right foot but appeared comfortable using his left too. Generally received to feet, either on the outside of the Italy backline or dropped short on the LW touchline. Did not witness much separation movement prior, so typically received with the Italy RB marking tightly from behind. An aerial target for long diagonals forward from the GK, and although he did not win any balls cleanly, he competed to ensure contested possession. Dropped to support his LB in the defensive third but was bypassed on a couple of occasions.
#10 Rico Sealey (AM): The most advanced midfielder, at times playing more as a second striker. Operated between the Italy midfield and defensive lines with a strong orientation towards England's right-hand side. At times interchanged with the RW to receive near the touchline. Predominantly used his right foot but appeared confident with his left. Attacking movements involved making runs beyond and between the Italy LCB and LB, both straight and diagonal, from in-to-out, to receive passes in behind. Offered to receive line-breaking passes in pockets inside the right half-space. Comfortable receiving under pressure and in congested areas.
Once in possession, Sealey looked to find teammates in behind (mixed success), play crosses into the box when in wide areas or the right half-space (decent quality), and use his quick feet and body feints to beat opponents 1v1 before finding a pass or cross (multiple successes). Frequently looked to find and link up with RW #7 Semakula. Out of possession, applied aggressive and often effective pressure from the forward line in high defensive phases, despite a physicality mismatch versus the Italy LCB (a lot smaller in height and frame).
#9 Ashiah Haughton-Sinclair (CF): Showcased quick close control and adjustment of his feet to get a powerful shot off inside the box for the 1-0 goal. Led the forward line, providing a physical presence to contest (and on occasions win) long balls. Dropped off to receive passes to feet and demonstrated an ability to control and hold up / link play under pressure.
Substitutions
#13 Thomas Armytage (GK): No notes.
#12 Miloh Kapotwe (RCB): No notes.
#14 Oliver Crofts (LB): Became England's main target in deep build-up, receiving low and wide before attempting to execute passing patters with mixed success. Gave away penalty after colliding with Italy attacker when retreating into own box. Became embroiled in back-and-forth with Italy opponents.
#15 Rocco Derafaka (RB): No notes.
#16 Zac Wattley (LCB): No notes.
#17 Arthur O’Keefe (RCM): Played the defensive midfield role. Won a number of interceptions, aerial duels and tackles inside and outside the box.
#18 Luca Eden (LCM): Operated in the inside-left channel. Played a box-to-box role. Involved in all phases of play, in and out of possession. Consistently looked to play forward with carries and passes. For the winning goal, Eden showcased composure and close control to receive under pressure inside the box before finding an intricate pass.
#19 Luis Munoz (AM): All-action cameo. Involved in all phases of play, in and out of possession. Operated as an advanced midfielder but roamed and dropped deep to get on the ball. Looked for combinations and passes out wide. Carried in attacking transitions. For the winning goal, Munoz showcased composure and dribbling ability to bypass pressure before executing a line-breaking pass to find Eden inside the box.
#20 Jaice Dore (LW): Very positive with attacking actions. Attempted to dribble opponents 1v1, both on the inside and outside. Created crossing and shooting opportunities. Won fouls in the final third. Aggressive out of possession, both high and low.
#21 Jaden Maghoma (CF): Involved in the lead-up and scoring of the winning goal. Showcased desire to get into the box, recognised available space, and quickly executed a powerful and accurate side-foot finish.
#23 Eden Mahoney-Smith (RW): No notes.
#22 Aaron Woolford (GK): Unused substitute.
Italy Team Observations
In Possession
As described in England's out-of-possession section, Italy used a direct attacking approach. Consistently playing balls into their forward line, then providing quick support from underneath, with their narrow midfield winning and landing on lots of second balls before initiating direct attacks against an exposed England backline with passes and runs beyond.
In slight contrast to the first game, Italy showed more patience in their build-up play. While ultimately the intention was to still play direct into their forward line, they circulated possession more, attempted to play through more, and took more risks, all in an attempt to manipulate England's defensive shape before going long, aiming to create conditions higher up the pitch that suited them and increased their chances of winning first and second contacts.
Once in the final third, Italy attacked in numbers, with six players, including at least one fullback, while their DM, CBs and other FB protected behind the ball. Despite their lack of direct width, Italy still attacked in wide areas, typically the inside channels, with their outside CMs and ball-side FB getting crosses into the box which Italy ensured to occupy with multiple players.
Out of Possession
As described in England's in-possession section, Italy used a narrow 4-1-3-2 defensive block - like they did (and described) in the first game.
Their out-of-possession system prioritised blocking England playing through. Due to its default narrowness, England were encouraged into playing around, with Italy prepared to apply pressure in wide areas, knowing that upon regain they had multiple central targets (#20, #21, #23) to immediately play into.
When defending their own half, Italy dropped into a 4-3-1-2. Their midfield diamond contracted to maintain horizontal compactness, but the AM #10 maintained his slightly advanced position within the midfield unit. Their ever-mobile outside CMs were tasked with supporting FBs to defend wide areas and tucking inside to support the DM.
Italy Player Observations
#12 Samuele Spanò (GK): No notes.
#13 Saverio Mesecorto (RB): No notes.
#15 Fabrizio Pasotti (RCB): No notes.
#16 Giulio Cacucciolo (LCB): No notes.
#17 Alessandro Gennaro Esposito (LB): No notes.
#14 Mattia Mirabella (DM): No notes.
#18 Davide Tilli (RCM): No notes.
#20 Mattia Pica (AM): No notes.
#19 Francesco Buondonno (LCM): No notes.
#23 Mark Chidozie Cordopatri (FOR): Displayed effective hold-up and link-up play, both shielding the ball to wait for support and playing first-time for support runners.
#21 Enzo Diofebo (FOR): No notes.
Substitutions
#2 Mirko Danza: No notes.
#5 Lorenzo Allara: No notes.
#6 Rubens Nebatumbu: No notes.
#3 Niccolò Chieffallo: No notes.
#4 Marco Vaccarella: No notes.
#8 Gabriel Tedesco: No notes.
#10 Lorenzo Vitali: No notes.
#7 Sean Luis Ebagua: No notes.
#9 Lorenzo Sassetti: No notes.
#11 Leonard Maria Lima Ramalho: No notes.
#1 Lorenzo Minicucci: Unused substitute.

Comments